Categories
Dry Ink

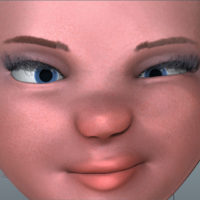
zbrush Gibson Girl hair test

A zBrush hair Render test.

Categories
Dry Ink

My goofy Mug

Here is the final render of my ZBrush Self Portrait sculpt. I created the sculpt entirely in ZBrush primarily using Dynamesh and Fibermesh techniques.

While making the model I stumbled upon the ZBrush retopology tools and spent a few nights learning how to implement them on my goofy mug. The retopolgy tools are a little clumsy but I found with time and effort that they were able to get the job done. Fibermesh can be a real memory drain so this new resource is a godsend for my little laptop. Now that I have a retopology option I am able to subdivide my models in a much more efficient way and increase the resolution I am able to work at significantly. I feel like a fool for not figuring out this function earlier.

me low poly
the model before retopology at its lowest subdivision level,

I love dynamesh, don’t get me wrong, but it can be difficult to work with on the back-end, especially after you have found your character.  The high polycounts cause lots of memory crashes which up your chances of lost work and make computational heavy actions like transposes nearly impossible. But the real killer and the reason I began researching retopology options is the lack of UV’s .  You create these beautiful characters but can’t do anything with them outside of ZBrush. The lack of UVs was a big problem for me on some of my previous sculpts especially when I was trying to render glass. At the time I wanted to render in MentalRay but couldn’t get any of my color information over to maya. Now I can do this easily so I couldn’t be happier.

My other big experiment this time around was using a morph target to sculpt the hair. My previous Fibermesh hair attempts all involved raw extrusions which I would sculpt using the move elastic brush to the desired styling. This time though I sculpted a guide model, ie morph target, and grew the hair to fill in the difference. This worked rather brilliantly and i’m pleased with the results. The one small catch is that my final hair has some unknown error which has block all attempts at exporting and transposing. I will have to rebuild it at some future date if I ever want to animate this fellow.

Topology

For those who are interested into this sort of thing. Here is the topology and a few hi-res renders.

http://www.youtube.com/watch?v=pkXioL_Gk5k&hd=1

Detail Renders

Categories
Dry Ink

Zbrush Sculpt: Return of the King – rough

This is a rough zbrush sculpt of the king I designed for Space Chimps. He was cut but I resurrected him here to appease my curiosity. Its been a long time since that project but I have been dying to know what my designs would have looked like in 3D. Now he’s still a work in progress but I wanted to share him because I’ve got a lot on my desk at the moment and it may be a while before I can finnish him.

Categories
Dry Ink

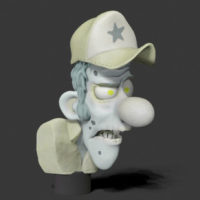
Zombie John

Apparently I forgot to post this Zbrush zombie sculpt. I made this fellow back around Halloween and has been sitting here in draft form for a few months. Its a tad out of season now but I guess late is better than never.

This was my first ZBrush 42Rb DynaMesh expirament. It was also my first use of the render filters function. Its a quick sculpt that dragged out into a few hours after I started playing around with the rendering features.

Categories
Dry Ink

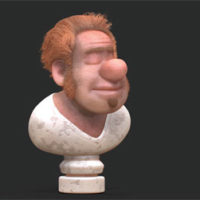
Red Headed Bloke Hair Test

Last night I stayed up late to test out Zbrush 4R2b’s new FiberMesh additions. For testing purposes I made this quick DynaMesh sculpt and threw some hair on him. What you see here is my third grooming attempt. The first two hair passes were tragic failures that more or less resembled the bastard child of an ugly carpet and a putting green.

Creating the hair is effortless but controlling its flow is a bit tricky. There are a dozen grooming brushes and I have yet to master any of them. The workflow is very clear though so I don’t think it will take long to get up to speed. I don’t have experience in any other hair systems, so I am by no means an expert, but was generally very impressed with FiberMesh. It is a welcomed addition to my quiver of design tools.

Categories
notes

Back online

It took longer than I thought but after a few weeks of frustrated coding and image rendering I finally have new theme up and running. Wahoo! Now I can finally turn my attention to more important activities, making art.

Categories
Dry Ink

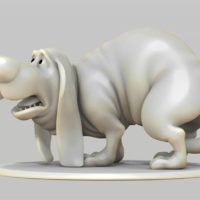
Scared Dog Pose

This is a folow up post to the previous Doggy Dog post.

I spent a bit of time working in ZBrush last week posing several old models. This dog model is one of my maya sculpts that I revisited. The work went pretty fast, I spent one night on this pose.

The dog isn’t rigged so to do the work I built a quick temporary Zsphere rig to block in the main gestures, then polished out the rest with normal matte transposing and sculpting techniques. The work was rather straight forward, the most difficult part being wrinkle management and keeping the skin from folding into itself. In this regard I wish ZBrush had a function like Mayas Ncloth which would prevent topology from passing through itself. Maybe it does and I just don’t know these things.

Rendering was done in Zbrush except for the stereoscopic “anagliphic” version below which had to be done in Maya using a stereo rig and mentalray.

Categories
Dry Ink

I have a long way to go before this model is rigged properly

monster walking
A quick maya render of the rig

I have been trying to learn how to rig the little monster character I started building and its clear from the start that I was never meant to be a rigger.

There are a million mistakes with his rig.  Controls fly all over the place and the whole thing is generally a mess.  Still I want to keep at it since its it would be fun to be able to make things that can move.  Its going to take a lot of time.  Until I really understand how constraints work nothing is going to moving anywhere fast.  For now, I am going to need a lot of aspirin and a few stiff drinks.

I have a very very very long way to go…

Categories
Dry Ink

Caustics

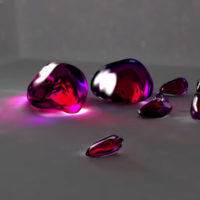
Another maya rendering experiment, this time with caustics. I should have render the scene with more rays, as you can see the refracted points dancing on the walls behind. Still I kind of like the disco ball effect it gives off. I had fun with this one. enjoy.