Categories
Dry Ink

zbrush Gibson Girl hair test

A zBrush hair Render test.

Categories
Dry Ink

My goofy Mug

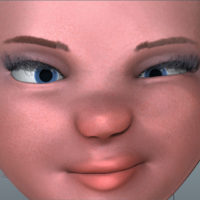
Here is the final render of my ZBrush Self Portrait sculpt. I created the sculpt entirely in ZBrush primarily using Dynamesh and Fibermesh techniques.

While making the model I stumbled upon the ZBrush retopology tools and spent a few nights learning how to implement them on my goofy mug. The retopolgy tools are a little clumsy but I found with time and effort that they were able to get the job done. Fibermesh can be a real memory drain so this new resource is a godsend for my little laptop. Now that I have a retopology option I am able to subdivide my models in a much more efficient way and increase the resolution I am able to work at significantly. I feel like a fool for not figuring out this function earlier.

me low poly
the model before retopology at its lowest subdivision level,

I love dynamesh, don’t get me wrong, but it can be difficult to work with on the back-end, especially after you have found your character.  The high polycounts cause lots of memory crashes which up your chances of lost work and make computational heavy actions like transposes nearly impossible. But the real killer and the reason I began researching retopology options is the lack of UV’s .  You create these beautiful characters but can’t do anything with them outside of ZBrush. The lack of UVs was a big problem for me on some of my previous sculpts especially when I was trying to render glass. At the time I wanted to render in MentalRay but couldn’t get any of my color information over to maya. Now I can do this easily so I couldn’t be happier.

My other big experiment this time around was using a morph target to sculpt the hair. My previous Fibermesh hair attempts all involved raw extrusions which I would sculpt using the move elastic brush to the desired styling. This time though I sculpted a guide model, ie morph target, and grew the hair to fill in the difference. This worked rather brilliantly and i’m pleased with the results. The one small catch is that my final hair has some unknown error which has block all attempts at exporting and transposing. I will have to rebuild it at some future date if I ever want to animate this fellow.

Topology

For those who are interested into this sort of thing. Here is the topology and a few hi-res renders.

http://www.youtube.com/watch?v=pkXioL_Gk5k&hd=1

Detail Renders

Categories
Dry Ink

Girl with White Hair

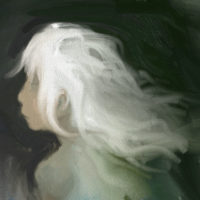
iphone artrage thumbnail doodle
iphone thumbnail doodle
Categories
Dry Ink

Scruffy looking ZBrush FiberMesh Sculpt


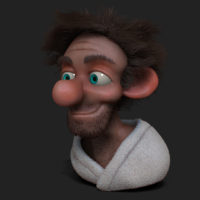
I couldn’t sleep last night so I jumped on Zbrush and made this lazy looking bum. I’m still amazed and how quickly you can make interesting looking objects in ZBrush. Something like this would have taken me a month a few years ago and now I can make it in under three hours.

For the record: This is a quick sculpt I made in ZBrush using DynaMesh for the face and Fibermesh for all of the hair elements as well as the robe. It was made using Zbrush 4R2b.

Categories
Dry Ink

Messy Hair with ZBrush FiberMesh

This is my second hair sculpting attempt using ZBrush 42Rb and the new FirberMesh feature. I’m struggling a little to find a setting that will work well for my characters. Most of the hair ends up looking too realistic or too much like straw. I believe painting will be the solution but for now I think this is an OK start.

The subject here is “The Mountain Bandit”, the main villain from my forever shelved Dragon project. I have made several attempts in the past to sculpt him but his scraggly hair was beyond my skill level. It’s nice to be able to see him finally come together.

This is by no means final, I still have a bit of work to do. Tonight I will try to make a second pass. He has a great head-dress that I want to add as well as some other costume dressings. I also need to get him out of that dead looking neutral pose. Still its a decent start and I thought merited sharing.

Categories
Dry Ink

Red Headed Bloke Hair Test

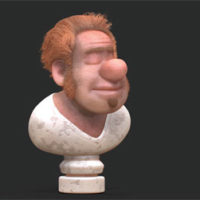
Last night I stayed up late to test out Zbrush 4R2b’s new FiberMesh additions. For testing purposes I made this quick DynaMesh sculpt and threw some hair on him. What you see here is my third grooming attempt. The first two hair passes were tragic failures that more or less resembled the bastard child of an ugly carpet and a putting green.

Creating the hair is effortless but controlling its flow is a bit tricky. There are a dozen grooming brushes and I have yet to master any of them. The workflow is very clear though so I don’t think it will take long to get up to speed. I don’t have experience in any other hair systems, so I am by no means an expert, but was generally very impressed with FiberMesh. It is a welcomed addition to my quiver of design tools.

Categories
Dry Ink

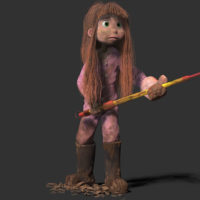
The Girl in the Pink Pajamas

Earlier in the month I spent several days working on this zbrush sculpt of a young farm girl. I was using it to test-drive a lot of zbrush 42R’s new features so the work was slow and a tad frustrating as I had to make a couple of the elements twice before moving on. Now that I have a better grasp on the app I must say I love all of the new options and am really impressed with how much MORE I am able to do because of it.

By far the most difficult hurdle I had to overcome while sculpting this model was learning how to hold and feed a baby in one arm while rocking another in its cradle with my foot. I looked like one of those one man bands! It was a delicate four A.M. balancing act that if managed correctly would allow me one free hand to sculpt and an elbow to press all of my function keys! It was a rather funny setup but it worked.