Categories
Dry Ink

My goofy Mug

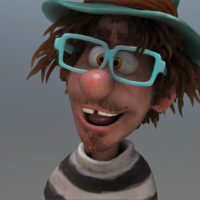
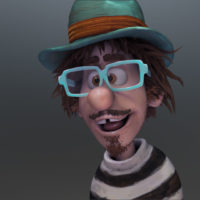
Here is the final render of my ZBrush Self Portrait sculpt. I created the sculpt entirely in ZBrush primarily using Dynamesh and Fibermesh techniques.

While making the model I stumbled upon the ZBrush retopology tools and spent a few nights learning how to implement them on my goofy mug. The retopolgy tools are a little clumsy but I found with time and effort that they were able to get the job done. Fibermesh can be a real memory drain so this new resource is a godsend for my little laptop. Now that I have a retopology option I am able to subdivide my models in a much more efficient way and increase the resolution I am able to work at significantly. I feel like a fool for not figuring out this function earlier.

me low poly
the model before retopology at its lowest subdivision level,

I love dynamesh, don’t get me wrong, but it can be difficult to work with on the back-end, especially after you have found your character.  The high polycounts cause lots of memory crashes which up your chances of lost work and make computational heavy actions like transposes nearly impossible. But the real killer and the reason I began researching retopology options is the lack of UV’s .  You create these beautiful characters but can’t do anything with them outside of ZBrush. The lack of UVs was a big problem for me on some of my previous sculpts especially when I was trying to render glass. At the time I wanted to render in MentalRay but couldn’t get any of my color information over to maya. Now I can do this easily so I couldn’t be happier.

My other big experiment this time around was using a morph target to sculpt the hair. My previous Fibermesh hair attempts all involved raw extrusions which I would sculpt using the move elastic brush to the desired styling. This time though I sculpted a guide model, ie morph target, and grew the hair to fill in the difference. This worked rather brilliantly and i’m pleased with the results. The one small catch is that my final hair has some unknown error which has block all attempts at exporting and transposing. I will have to rebuild it at some future date if I ever want to animate this fellow.

Topology

For those who are interested into this sort of thing. Here is the topology and a few hi-res renders.

http://www.youtube.com/watch?v=pkXioL_Gk5k&hd=1

Detail Renders

Categories
Dry Ink

ZBrush Self-Portrait

zbrush cartoon sculpt of Sterling Sheehy
Hey look its me!

I’m working on ZBrush self-Portrait at the moment. Nothing official just killing time while i’m up late watching the babies.

I just finished sculpting in the hair and thought I would share my render. I’m trying a different fibermesh technique this time for sculpting hair. I would like to get away from a real hair look so this time I’m using it to create large chunky sections that I dynamesh and add detail too. I’m going to build up a “hand painted” texture and see if I can get a nice 2.5d look going. Just playing around so no promises on where this will go.

Maybe I can use this thing to make some silly gif animations or something. That might be fun for the site.

Categories
Dry Ink

Long live the King

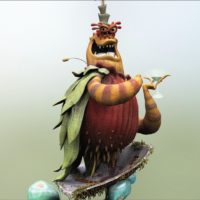
So here is the final render of “the King”. He was created entirely in zBrush and took about a weeks worth of late night sculpting sessions to complete. In case you have been out of the loop on this guy. He is a character I designed for the movie Space Chimps in collaboration with Dean Taylor and the rest of the art team while working on the film Space Chimps. Our designs were cut but I resurrected him here to appease my own curiosity.

Render Pains

It was a fun project but took more time than I was expecting as I ran into a bit of trouble towards the end. I like the sculpt but I must admit that I am disappointed with the render. I had all sorts of technical issues and have decided to call it quits.

The rendering of the king himself is ok, but the little Luzian aliens are not properly rendered. Their material is all wrong and should actually look like blown glass. Wouldn’t you know, one of the shortfalls of zBrush is that it can’t render caustics, so no glass. The best it can manage is a sudu-transparent material. It also turns out, you can’t have a transparent object behind another transparent object, to fake glass, as the first object will completely matte out the later. I didn’t know this when I began or else I would have changed my workflow to be able to render in MentalRay. Since I used dynamesh on all the characters they lack UV’s and have insanely high poly counts so Rendering in Maya was out of the question. So in the end rather than glass-like aliens I get waxy, oily looking ones. Sigh. Que Sera, Sera.

Still, render issues aside, everything looks ok and I am happy. I have my closure now and can move on to other things. I learned alot from this project and am glad I did it.

The Making of the king

Here are a few work in progress pictures.

Categories
Dry Ink

Alien Tree Zbrush Sculpt

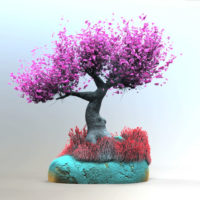
This is from earlier in the week but I never had the time to post it. It’s a A quick tree sculpt I made in ZBrush. The base of the tree was made using zsphears and dynamesh but all the branches, leaves and grass were made with FiberMesh.

Categories
Dry Ink

Scruffy looking ZBrush FiberMesh Sculpt


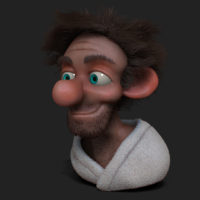
I couldn’t sleep last night so I jumped on Zbrush and made this lazy looking bum. I’m still amazed and how quickly you can make interesting looking objects in ZBrush. Something like this would have taken me a month a few years ago and now I can make it in under three hours.

For the record: This is a quick sculpt I made in ZBrush using DynaMesh for the face and Fibermesh for all of the hair elements as well as the robe. It was made using Zbrush 4R2b.

Categories
Dry Ink

Messy Hair with ZBrush FiberMesh

This is my second hair sculpting attempt using ZBrush 42Rb and the new FirberMesh feature. I’m struggling a little to find a setting that will work well for my characters. Most of the hair ends up looking too realistic or too much like straw. I believe painting will be the solution but for now I think this is an OK start.

The subject here is “The Mountain Bandit”, the main villain from my forever shelved Dragon project. I have made several attempts in the past to sculpt him but his scraggly hair was beyond my skill level. It’s nice to be able to see him finally come together.

This is by no means final, I still have a bit of work to do. Tonight I will try to make a second pass. He has a great head-dress that I want to add as well as some other costume dressings. I also need to get him out of that dead looking neutral pose. Still its a decent start and I thought merited sharing.